
When I say favorite recipes, I really mean the dishes my family actually asks for on repeat – simple, budget-friendly, and stress-free. This running list pulls together our favorite recipes for weeknights, holidays, church potlucks, and cozy Sundays. Most use pantry staples, come together fast, and scale easily for a crowd. I’ll keep adding more of our favorite recipes as I find new keepers or rediscover classics from family gatherings (Hazel Terry’s Jell-O masterpieces included!).
If you’re brand new to the kitchen, start with any dessert salad or dump cake – they’re nearly foolproof. If you love a sit-down dinner, try the Alfredo and biscuits combo with a side salad and call it done. Bookmark this page, share it, and come back whenever you need a reliable go-to. GO HERE to learn more about Homecooked meals.
Cooking is more than just following directions. It’s about connection, comfort, and creativity. That’s why these are my favorite recipes to share. Each one offers a balance of flavor, simplicity, and nostalgia. From soups that warm the soul to desserts that make everyone smile, these favorite recipes fit any occasion and every cook’s level of experience.
How to use this page
- Pick 1 main + 1 simple side + 1 make-ahead dessert for an instant menu.
- Skim each recipe’s quick tips – those tiny notes save time (and dishes).
- Cooking for a crowd? Double the mains, but keep desserts as written (they stretch far!).
Why These Really Are My Favorite Recipes
The beauty of these favorite recipes is that they never go out of style. They work for every season, every family size, and every level of cooking skill. Whether you’re whipping up an easy dessert salad, prepping a quick weeknight meal, or serving comfort food to guests, these favorite recipes save time while keeping flavor front and center. You’ll find that once you try a few, they quickly become your own favorite recipes to revisit again and again.
Cooking should feel joyful, not stressful and that’s exactly why this list of favorite recipes exists. Every dish here proves that simple ingredients can create something truly special. From soups to casseroles, to rich desserts that taste homemade every time, these favorite recipes celebrate the best parts of cooking: warmth, sharing, and memories made around the table.
More to Love About Favorite Recipes
What makes these truly favorite recipes is how flexible they are. You can swap ingredients, double them for crowds, or even tweak them for dietary needs without losing flavor. Each dish started as a simple family favorite and became part of our mealtime traditions. Whether it’s a comforting soup on a chilly night or a sweet dessert salad at a summer potluck, these favorite recipes have a way of bringing people together around the table.
Over the years, I’ve discovered that the best favorite recipes aren’t just about taste – they’re about memories. Maybe it’s the smell of baked hashbrown casserole that reminds you of home, or the first time you learned how to make a dump cake that impressed everyone at the party. These favorite recipes have stood the test of time, proving that easy, affordable meals can also be deeply meaningful. I hope as you try each one, they become part of your own collection of favorite recipes to share and pass down.
Handy Tips for Better Results
- Room-temp dairy melts smoother. Let cream cheese and butter soften for lump-free fillings and sauces.
- Measure flour right. Fluff, spoon, and level – don’t scoop -and your cakes won’t turn dense.
- Salt in layers. Season as you go (soup veg → broth → finish) for brighter flavor with less salt overall.
- Let it rest. Meatloaf and poke cakes both improve after a short rest – juicier slices, cleaner cuts.
- Make-ahead magic. Dump cakes, salads, and casseroles are perfect one day ahead for events.
EASY DESSERT SALADS
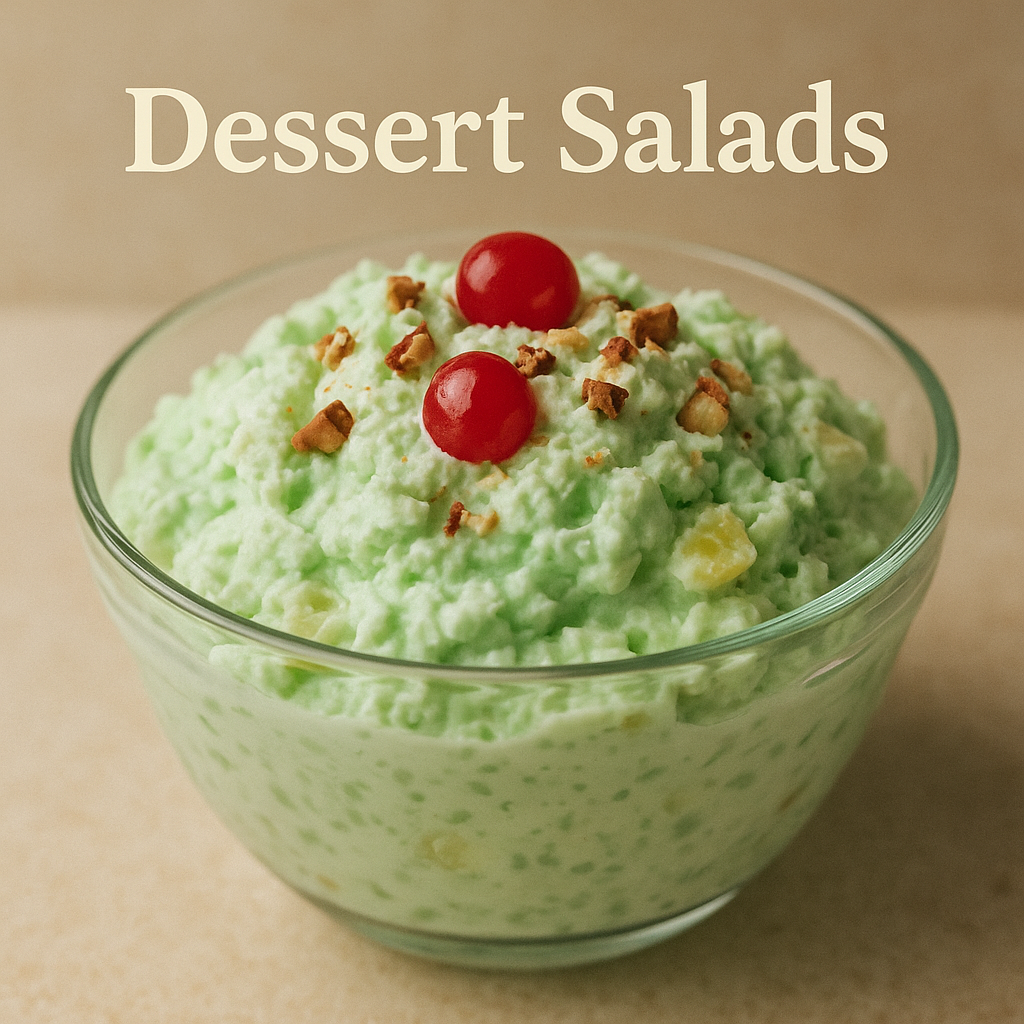
HEAVENLY HASH
- 1 ¾ cups whipped topping such as Cool Whip
- ¼ cup sour cream
- 1 teaspoon cocoa powder
- 1 ½ cups miniature marshmallows
- 8 ounces canned pineapple tidbits liquid drained
- 8 ounces canned mandarin oranges liquid drained
- ½ cup slivered almonds
- ¼ cup maraschino cherries
Directions:
- Combine whipped topping, sour cream, and cocoa powder together in a large bowl, whisking until smooth.
- Add marshmallows, pineapple, orange slices, almonds, and cherries to the bowl. Gently mix everything together until well combined.
- Ready to serve immediately or can be placed in the refrigerator to serve later.
STRAWBERRY PRETZEL SALAD:
- 2½ cups pretzels
- 1½ cups sugar
- ¾ cup butter
- 12 oz cream cheese
- 2 tsp vanilla
- 12 oz cool whip
- 3-4 cups strawberries
- 6 oz strawberry gelatin
- 2 cups water
Directions:
- Mix pretzels, melted butter, and sugar; press into a baking dish. Bake at 350°F for 10 minutes. Cool.
- Whip cream cheese and whipped topping; spread over crust. Chill.
- Dissolve strawberry gelatin in 2 cups boiling water, cool slightly, and pour over sliced strawberries. Chill until set.
COTTAGE CHEESE JELLO SALAD:
- 16 oz container cottage cheese
- 3 oz box orange gelatin
- 20 oz crushed pineapple
- 15 oz mandarin oranges
- 2 cups miniature marshmallows
- 8 oz thawed whipped topping
Directions:
- Mix cottage cheese and dry gelatin together in a bowl.
- Add pineapple and marshmallows, then fold in whipped topping.
- Chill 2–3 hours before serving.
WATERGATE SALAD:
- 2 boxes boxes of pistachio pudding mix
- 1 large can crushed pineapple
- 12 oz whipped topping
- ½ cup chopped pecans
- 1½ cups white mini marshmallows
- chopped pecans and maraschino cherries
- 1 cup shredded coconut
Directions:
- Mix pudding mix with pineapple (juice included).
- Fold in whipped topping and nuts or coconut.
- Chill before serving.
SNICKERS SALAD:
- 3.4 oz instant vanilla pudding packet
- ¾ cup milk
- 8 oz whipped topping
- 6 medium granny smith apples
- 6 full size Snickers bars
- Caramel sauce
Directions:
- Combine apples and chopped Snickers in a bowl.
- Fold in whipped topping and caramel sauce.
- Chill for at least 1 hour before serving.
GRAPE SALAD:
- 3½ cups red grapes
- 3½ cups green grapes
- 4 oz cream cheese
- 1¼ cup plain Greek yogurt
- ½ cup brown sugar lightly
- 1 tsp lemon juice
- 1¼ cups walnuts
- ¼ cup light brown sugar
Directions:
- Mix cream cheese, sour cream, and sugar until smooth.
- Add grapes and toss to coat.
- Sprinkle with brown sugar and nuts before serving.
STRAWBERRY BANANA CHEESECAKE SALAD:
- 8 oz cream cheese
- ¼ cup granulated sugar
- 1 tsp pure vanilla extract
- 1½ cups strawberry
- banana yogurt
- 8 oz container whipped topping
- 4 cups fresh strawberries
- 2½ cups ripe bananas
Directions:
- Beat cream cheese, yogurt, and sugar until smooth.
- Fold in whipped topping and fruit.
- Chill 1 hour before serving.
WALDORF SALAD:
- 1 cup granny smith apple
- 1 cup sweet apple fuji
- 1 tbsp lemon juice fresh
- 1 cup diced celery
- 1 cup green grapes
- 1 cup red grapes
- 1 cup walnuts
- 3 tbsp heavy cream
- 3 tbsp mayonnaise
- 1 tbsp strained honey
Directions:
- Combine fruit, celery, and nuts in a bowl.
- Stir in mayo or yogurt until lightly coated.
- Chill before serving.
FAVORITE RESTAURANT REMAKES

OLIVE GARDEN ALFREDO SAUCE
- 16 ounces fettuccine
- 6 tablespoons salted butter
- 1 tablespoon garlic, minced
- 1 teaspoon garlic powder
- ½ teaspoon salt
- 2 tablespoons all-purpose flour
- 1¼ cup heavy whipping cream
- 1½ cup whole milk
- 1 cup parmesan cheese, shredded
- fresh parsley, finely chopped
Directions:
- Cook pasta per package directions, drain and set aside.
- In a large skillet over medium heat, add butter and let it melt. Add minced garlic, garlic powder, and salt. Whisk together to combine.
- Sprinkle the flour over the butter and garlic mixture. Whisk together and then slowly add the heavy cream and milk while whisking. Let sauce begin to boil and then reduce heat to low and allow it to simmer for 2 to 3 minutes.
- Add parmesan cheese and whisk together.
- Add the cooked and drained fettuccine. Use tongs to toss the pasta in the sauce.
- Garnish with fresh parsley and serve.
TIPS:
- Heating the butter and cream to bubbling so that the cheese melts better when added.
- To help make your sauce extra creamy, allow your cheese to come to room temperature before adding it to the sauce.
- Alfredo sauce thickens while standing and thickens even more when added to pasta. If it seems too thin, resist the urge to thicken it as it will thicken once mixing it with your pasta.
CRACKER BARREL HASHBROWN CASSEROLE
- 10.5 ounces cream of chicken soup
- 1 cup sour cream
- ½ cup yellow onion, chopped small (about ½ of a medium onion)
- 2 teaspoons garlic powder
- 2 teaspoons salt
- ½ teaspoon black pepper
- 2 cups sharp cheddar cheese, shredded and divided in half
- 30 ounces hashbrowns, shredded and thawed/room-temperature
Directions:
- Preheat oven to 350°F. Spray a 2½-quart casserole dish with cooking spray. Set aside.
- In an extra-large mixing bowl, add the cream of chicken soup, sour cream, chopped yellow onion, garlic powder, salt, black pepper and 1 cup of the shredded sharp cheddar cheese. Stir to combine and evenly incorporate all the ingredients together.
- Add hashbrowns and mix just until combined.
- Transfer the hashbrown mixture to the prepared casserole dish. Top the mixture with the remaining 1 cup shredded sharp cheddar cheese and cover it with aluminum foil.
- Bake the Cracker Barrel hashbrown casserole for 30 minutes covered with the foil. Remove the foil and bake for an additional 15 minutes, uncovered, or until the casserole is bubbling and the cheese is melted and lightly golden. Allow to cool for 5 minutes on the counter before serving.
TIPS:
- If you have purchased frozen hashbrowns, then you need to plan ahead for this recipe and allow your hashbrowns to thaw according to your package directions. If you are able to find the hashbrowns in the refrigerated section of your grocery store, then you are all set and can make this recipe when ready.
- You can make this easy recipe up to 24 hours ahead of time, and store it in the fridge covered with aluminum foil, before baking. Allow it to come to room temperature before baking. This is an important step to avoid cracking your casserole dish. If you put a very cold dish into a very hot oven you are risking a dangerous situation in the kitchen.
- I like to use an 8-ounce block of cheddar cheese and shred it myself to get 2 cups. I find that the pre-shredded cheeses do not melt as nicely in recipes due to the additives added to them to prevent clumping while in the bags.
- This loaded hashbrown casserole should be served while warm for best results.
CRACKER BARREL MEATLOAF
For the Meatloaf Base
- 2 pounds lean ground beef, 80/20 ground beef
- 1 ¼ cup crushed Ritz crackers
- 1 cup sharp cheddar cheese, freshly shredded
- ½ cup green bell pepper, finely chopped
- ½ cup sweet yellow onion, finely diced
- ½ cup half and half, or whole milk
- 2 extra large eggs, beaten
- 1 ½ teaspoon kosher salt
- 1 teaspoon fresh cracked black pepper
For the Ketchup Glaze
- ¾ cup ketchup, We used Heinz brand
- 2 ½ tablespoons light brown sugar, packed
- 2 teaspoons prepared yellow mustard, We used Heinz brand
- 2 teaspoons Worcestershire sauce, We used Heinz brand
Directions:
- Preheat the oven to 350°F. Line a rimmed baking sheet with parchment paper or heavy-duty aluminum foil. (You can line your baking sheet with both parchment paper and heavy duty foil. This will help make clean-up much easier.)
- Add the ground beef, crushed cracker crumbs, shredded cheddar cheese, chopped bell pepper, diced onion, half and half, beaten eggs, salt and pepper to a large (4-5 quart) mixing bowl.
- Next, you can use either a large spoon, or your hands to mix/blend the ground beef and seasonings together until well incorporated. (If you choose to mix with your hands, please be sure to use disposable gloves. I prefer to use my hands to mix, so I always have disposable gloves on hand)
- Place the meatloaf base in the center of the prepared baking sheet. Shape the meatloaf into a rectangular shape that is about 10 inches long and 6 inches wide. Bake for 30 minutes. While the meatloaf is baking, make the glaze.
- Add the ketchup, brown sugar, mustard, and Worcestershire sauce to a small (3-4 cups) bowl. Whisk to completely combine.
- After the meatloaf has baked for 30 minutes, remove the meatloaf from the oven. Evenly spread the ketchup glaze over the top of the meatloaf. Return the meatloaf to the oven and bake for an additional 40 minutes. The internal temperature needs to be 160°F.
- Remove the meatloaf from the oven and allow the meatloaf to rest for 10 minutes.
- Use a sharp kitchen knife to carefully cut ten ½ inch slices. Serve while hot.
TIPS:
- Use Fresh Ingredients: Freshly shredded cheese and freshly chopped vegetables will give the best flavor and texture. Pre-packaged shredded cheese can contain anti-caking agents that might affect the texture.
- Avoid Overmixing: Mix the meatloaf ingredients just until they are combined. Overmixing can make the meatloaf dense and tough.
- Handling the Meat: When mixing the meat mixture, try not to compress it too much. Light handling will help keep the meatloaf tender.
- Visual Cues: Look for visual cues such as a browned, slightly caramelized glaze on top and clear, not pink, juices running from the meatloaf to judge doneness. Overcooking can lead to a dry meatloaf.
- Resting Time: Allow the meatloaf to rest for at least 10 minutes after baking. This helps the juices redistribute throughout the meat, making it more moist and easier to slice.
- Glaze Burns: If the glaze begins to burn or gets too dark, tent a piece of foil overtop (you don’t have to tuck it tightly around the meatloaf).
RED LOBSTER BISCUITS
- ¾ cup unsalted butter melted and divided
- ¾ cup full-fat buttermilk cold
- 1½ cups self-rising flour
- 1 tablespoon granulated sugar
- 1 teaspoon baking powder
- 1 teaspoon garlic salt
- ½ teaspoon garlic powder
- 3 tablespoons fresh parsley chopped and divided
- 1½ cups sharp cheddar cheese shredded
Directions:
- Preheat the oven to 450°F. Line a large rimmed baking sheet with parchment paper. Set aside.
- In a medium bowl, with a pour spout, combine ½ cup of the melted butter with the cold buttermilk. Stir to incorporate fully.
- In a large mixing bowl, combine the self-rising flour, granulated sugar, baking powder, garlic salt, garlic powder and 2 tablespoons of fresh chopped parsley. Once all those ingredients are combined, add the shredded cheddar cheese and toss the cheese in the flour mixture so that all the cheese is coated.
- Add the buttermilk and melted butter mixture to the flour mixture and gently combine with a wooden spoon until all the liquid is incorporated into the flour. Do not overmix the batter.
- Using a 2-inch cookie scoop, scoop out the biscuits onto the prepared baking sheet 2 inches apart.
- Bake for 12 to 14 minutes or until lightly golden on the edges.
- In a small dish, melt the remaining ¼ cup unsalted butter and add the remaining 1 tablespoon chopped fresh parsley. Stir to combine.
- When the biscuits come out of the oven, using a pastry brush, brush them with the additional parsley-infused melted butter.
- Allow the biscuits to cool for 5 minutes on the baking sheet before removing them to serve.
TIPS:
- An ice cream scoop works too if you don’t have a cookie scoop.
- Don’t forget the garlicky butter topping after the warm biscuits come out of the oven. That’s what gives these biscuits the classic “cheddar bay” flavor.
OLIVE GARDEN PASTA
- 2 pounds chicken breasts, 3 to 4 pieces boneless skinless
- 1 teaspoon kosher salt, divided in half
- ½ teaspoon black pepper, divided in half
- 0.7 ounces dry Italian dressing mix
- 1 cup chicken broth, low-sodium
- 16 ounces penne pasta
- 10 tablespoons unsalted butter
- ½ cup all-purpose flour
- 2 tablespoons fresh garlic, grated
- 1 tablespoon dried parsley
- 2 cups half & half
- 1½ cups heavy cream
- 1½ cups parmesan cheese, grated
- 1 tablespoon fresh parsley, chopped (optional garnish)
Directions:
- In the insert of your slow cooker/crockpot, place your boneless skinless chicken breasts. Sprinkle ½ teaspoon kosher salt and ¼ black pepper evenly over the chicken. Sprinkle the entire contents of the dry Italian dressing mix evenly over the chicken as well.
- Pour the chicken broth into the crockpot with the chicken and spices. Cover with the lid and turn on HIGH for 4 hours.
- Once your chicken is done, remove it and shred it using 2 forks to pull it apart into bite-sized pieces.
- Pour out all but 1 cup of the excess liquid that is remaining in the pot. Return the shredded chicken back to the crockpot insert and add back the reserved 1 cup of the seasoned cooking liquid.
- Turn your crockpot to WARM while you cook your pasta and make your sauce.
- Cook your pasta according to package directions (8 to 10 minutes) and drain when done.
- In a medium saucepan, on medium heat, melt your butter. Once your butter is melted, whisk in the flour making sure there are no lumps.
- Add your grated garlic, dried parsley, remaining ½ teaspoon salt, and ¼ teaspoon black pepper. Whisk to combine. Slowly add the half & half and heavy cream, making sure that you are whisking the entire time. This is very important to avoid any lumps in your final alfredo sauce.
- Cook your cream mixture for 5 to 6 minutes, whisking often, until it starts to bubble and thicken. Once your cream mixture has thickened, turn off the heat and add your grated parmesan cheese. Stir to completely combine.
- Add your cooked and drained pasta to your shredded chicken, then pour your Alfredo sauce on top. Stir to combine. You can top your slow cooker Olive Garden chicken Alfredo pasta with fresh chopped parsley at this time if desired.
TIPS:
- Heat the butter and cream to bubbling so that the cheese melts better when added.
- To help make your sauce extra creamy, allow your cheese to come to room temperature before adding it to the sauce.
- Alfredo sauce thickens while standing and thickens even more when added to the cooked pasta. If it seems too thin, resist the urge to thicken it as it will thicken once mixed with your pasta.
- You can keep your crockpot on warm for 30 minutes before the pasta gets too soft and absorbs excess moisture.
CHICK FIL A COPYCAT SAUCE
- 2 teaspoons yellow mustard
- 2 tablespoons barbecue sauce
- ½ cup mayonnaise
- 1 tablespoon honey
- ⅛ teaspoon garlic powder
Directions:
- In a small mixing bowl, combine yellow mustard, barbecue sauce, mayonnaise, honey, and garlic powder. Use a whisk to combine.
- Serve with fries, chicken, fish or your favorite meat!
TIPS:
- A spoon may not be able to combine this sauce well enough. A whisk should give you the desired smooth texture.
EASY DUMP CAKES

APPLE DUMP CAKE
- 6 cups cold water
- ¼ cup lemon juice
- 9 large Granny Smith apples (peeled, cored, diced)
- 1 tsp cinnamon
- ½ cup sugar
- ½ cup light brown sugar (packed)
- 1 tsp apple pie spice
- 1 box yellow cake mix
- ½ cup cold butter (sliced into pats)
- ¼ cup melted butter
Directions:
- Preheat the oven to 350°F. Spray a 9×13 baking dish with cooking spray.
- Pour the 6 cups of cold water into a large mixing bowl.
- Add the ¼ cup of lemon juice to the cold water.
- Place peeled, cored, and diced apples into the lemon water.
- Using a colander, completely drain the diced apples.
- Transfer the drained diced apples back into the same large mixing bowl.
- Sprinkle the diced apples with the sugars, cinnamon, and apple pie spice. Using a large spoon, toss the apples until well coated.
- Pour the coated apples into the buttered baking dish, making sure to spread the apples evenly.
- Top the apples with the cake mix. Gently shake the pan to help distribute the cake mix.
- Arrange the cold butter pats evenly on top of the dry cake mix.
- Using a spoon, drizzle the melted butter between the butter pats.
- Place the apple dump cake in the oven, and bake for 50 minutes or until the top is golden brown.
- Serve warm.
PECAN DUMP CAKE
- 2¾ cups dark brown sugar (packed, divided into 2 cups & ¾ cup)
- 1 cup dark corn syrup
- 1¼ cup salted butter (melted & cooled, divided ½ cup & ¾ cup)
- 3 large eggs (room temperature)
- 2 tsp pure vanilla extract
- 4 cups pecan halves (divided into 3 cups & 1 cup)
- 15.25 oz white cake mix
- 1 cup hot water
- Caramel topping (optional)
Directions:
- Preheat the oven to 350°F. Generously spray a 9×13 (or 13×9) baking dish with nonstick cooking spray.
- Add 2 cups dark brown sugar, dark corn syrup, ½ cup melted butter, eggs, and vanilla to a medium-sized mixing bowl (2-3 quarts). Whisk to combine.
- Stir in the 3 cups of pecan halves. Evenly spread the pecan mixture into the sprayed baking dish.
- Sprinkle the dry cake mix over the pecan filling.
- Drizzle the remaining ¾ cup of melted butter over the dry cake mix.
- Sprinkle the remaining ¾ cup dark brown sugar over the butter layer.
- Pour the hot water over the top of the dry cake mix and butter. Do not mix. You can carefully tilt the cake pan to distribute the water over the cake mix.
- Sprinkle the remaining 1 cup pecan halves over the cake and water layer.
- Bake for 35-40 minutes or until golden brown. Because all ovens bake differently, check on the cake at the 30-minute mark. Also, it will be a bit jiggly in the center, but it will firm up as it cools. It will not be solid like a cake center. Allow the cake to cool completely before serving. (twelve ¾-cup servings).
STRAWBERRY CHEESECAKE DUMP CAKE
- 42 oz strawberry pie filling
- 8 oz cream cheese (softened)
- ¼ cup sour cream
- ½ cup powdered sugar
- 1 tsp vanilla extract
- 15.25 oz white cake mix
- 1 cup salted butter (cold)
Directions:
- Preheat the oven to 350°F.
- Spread the strawberry filling into the bottom of a 9×13-inch baking dish.
- In a medium bowl, use a hand mixer to combine cream cheese, sour cream, powdered sugar, and vanilla extract until smooth and combined.
- Drop spoonfuls of the cream cheese mixture over the strawberry filling.
- Sprinkle the cake mix evenly over the first two layers.
- Slice very thin pats of butter and spread over the entire top of the dry cake mix. Cover as much of the cake mix as possible. Cold butter is much easier to slice and to maintain square pats for covering the top of the dump cake.
- Bake for 40 minutes or until the topping is browned and the strawberry filling is bubbling around the edges.
- Allow dump cake to rest for 15 minutes before serving it.
BLUEBERRY CREAM CHEESE DUMP CAKE
- 42 oz blueberry pie filling
- 8 oz cream cheese (softened)
- ¼ cup sour cream
- ½ cup powdered sugar
- 1 tsp vanilla extract
- 15.25 oz white cake mix
- 1 cup salted butter (cold)
Directions:
- Preheat the oven to 350°F. Spray a 9×13-inch baking dish with non-stick spray.
- Spread the blueberry filling into the bottom of the pan.
- In a medium bowl, use a hand mixer to combine the cream cheese, sour cream, powdered sugar, and vanilla extract until smooth and combined.
- Drop spoonful’s of the cream cheese mixture over top of the pie filling.
- Sprinkle the cake mix evenly over the first two layers.
- Slice very thin pats of butter and spread over the entire top of the cake mix. Cover as much of the cake mix as possible. Using cold butter is much easier to slice and to maintain square pats for covering the top of the dump cake.
- Bake cake for 40 minutes or until the topping is browned and the blueberry filling is bubbling around the edges.
- Allow the dump cake to rest for 15 minutes before serving it.
CHOCOLATE DUMP CAKE
- ½ cup unsalted butter (melted, not hot)
- 1 box chocolate cake mix
- 1 (5.1 oz) box instant chocolate pudding
- 2½ cups whole milk
- 12 oz semi-sweet chocolate chips
Directions:
- Spray a 9×13 casserole dish with nonstick spray and preheat your oven to 350°F.
- Sprinkle the chocolate cake mix evenly in the dish.
- Sprinkle the instant chocolate pudding mix evenly across the cake mix.
- Add the milk to the butter – make sure the butter isn’t hot, so the milk doesn’t curdle.
- Pour the milk/butter mix on top of the cake and pudding mix.
- Use a whisk to mix slightly – you don’t need to stir entirely, but you do want it slightly incorporated so that it bakes evenly.
- Sprinkle the entire bag of chocolate chips across the top.
- Place in the oven to bake for 40-45 minutes.
- Serve warm with ice cream.
LEMON DUMP CAKE
- 2 (12 oz) jars lemon curd
- 8 oz cream cheese (softened)
- 1 large egg (room temperature)
- ¼ cup sugar
- 1 (15.25 oz) box vanilla, lemon, yellow, or white cake mix
- ½ cup salted butter (cold)
Directions:
- Preheat the oven to 350°F.
- Spread the lemon curd into the bottom of a 9×13-inch baking dish.
- In a medium bowl, use a hand mixer to combine cream cheese, egg, and granulated sugar until smooth and combined.
- Drop spoonfuls of the cream cheese mixture over the lemon curd.
- Sprinkle the cake mix evenly over the first two layers.
- Slice very thin pats of butter and spread over the entire top of the dry cake mix. Cover as much of the cake mix as possible.
- Bake for 40 minutes or until the topping is browned and the lemon filling is bubbling around the edges.
- Allow dump cake to rest for 15 minutes before serving.
PINEAPPLE DUMP CAKE
- 2 cans crushed pineapple
- 1 box yellow cake mix
- 1/2 cup brown sugar
- 1 cup unsalted butter
Directions:
- Preheat your oven to 350°F (175°C). Grease a 9×13-inch baking dish lightly with butter or nonstick spray.
- Pour the crushed pineapple, along with its juice, evenly into the prepared baking dish.2 20-ounce cans crushed pineapple
- Sprinkle the dry yellow cake mix over the pineapple layer, making sure to cover all the fruit.15.25 ounce yellow cake mix
- Evenly sprinkle the brown sugar over the cake mix layer.½ cup brown sugar
- Drizzle the melted butter over the top, ensuring it covers as much of the dry mix as possible.1 cup (2 sticks) unsalted butter
- Place the dish in the preheated oven and bake for 40-45 minutes, or until the top is golden brown and bubbly.
- Remove the cake from the oven and let it cool slightly for about 10-15 minutes.
- Serve warm, topped with a scoop of vanilla ice cream and a maraschino cherry. Enjoy!
POKE CAKES

CINNAMON ROLL POKE CAKE
- 1 box vanilla (white) cake mix, prepare as directed on the box Filling
- 5 tablespoons butter
- ½ cup light brown sugar, packed
- 3 teaspoons ground cinnamon
- 2½ teaspoons clear vanilla extract
- 14 ounce can sweetened condensed milk
Frosting
- 8 tablespoons butter, softened (½ cup)
- 8 ounces cream cheese, softened
- 2 teaspoons clear vanilla extract, you can use vanilla extract if you do not have the clear vanilla (the clear vanilla flavoring keeps the frosting white)
- 2 teaspoons half and half
- 2½ cups powdered sugar
Directions:
- Preheat the oven to 350°F. Spray a 9 x 13 baking dish with a baking spray.
- Prepare the cake as directed on the cake box. Some white cake box recipes give the option of 2 to 3 eggs using the whole egg or only the egg whites. Either works for this recipe, so it’s a personal preference. These box cakes are almost always done baking several minutes before the suggested bake times on the back of the box, so keep an eye on them in the oven! After baking, allow the cake to cool until it is still just slightly warm to the touch.
- Using the end handle of a silicone spoon or spatula or a wooden handled spatula, poke holes in the cake. Spread the holes approximately ½ inch apart.
- In a heat-safe bowl, add the 5 tablespoons of butter, light brown sugar, ground cinnamon, vanilla extract, and sweetened condensed milk. Whisk until all the ingredients are combined. Place the bowl in the microwave and heat on high for 1 minute, remove and stir. Heat for another minute and stir. Stir and make sure all brown sugar clumps have been removed. Return to the microwave for 30-second increments until all lumps are removed.
- Carefully ladle the melted butter mixture evenly over the top of the cake.
- Using a stand mixer or a handheld mixer and a medium-sized mixing bowl, on medium to medium-high speed, cream the 8 tablespoons of butter and cream cheese together. Scrape down the sides of the mixing bowl.
- Reduce the mixer speed to low, then add the clear vanilla flavoring, half and half cream, and the powdered sugar ½ cup at a time. Return the mixer speed to medium and continue mixing until the frosting is smooth.
- Spoon all of the frosting on the cake, and using a silicone spatula smooth the frosting. Any leftovers can be stored in an airtight container.
TIPS:
- Some white cake box recipes give the option of 2 to 3 eggs using the whole egg or only the egg whites. Either works for this recipe, so it’s personal preference. These box cakes are almost always done baking several minutes before the suggested bake times on the back of the box so keep an eye on them in the oven!
- I prefer using the end of a silicone spatula and poking holes while the cake is still just slightly warm, the cake slips right off the spatula and doesn’t cause any surface cake rips.
- When you’re pouring the mixture into the holes, tap the pan on the counter a few times to get rid of any air bubbles and make sure the sauce fills the holes completely.
BANANA PUDDING POKE CAKE
- 1 box yellow cake mix (made according to package directions with 1 cup water, ½ cup vegetable oil & 3 eggs)
- 5.1 ounces instant banana-flavored pudding
- 3½ cups whole milk, cold
- 2 to 3 bananas, peeled and sliced very thin – no more than ¼-inch thick slices
- 8 ounces Cool Whip whipped topping, thawed
- 12 vanilla wafers, for garnish
Directions:
- Preheat the oven to 350°F. Lightly spray a 9×13-inch baking pan with baker’s spray. Set aside.
- In a large mixing bowl, add the water, vegetable oil, eggs, and contents of the yellow cake mix.
- Whisk by hand for 1 minute or until completely combined and no lumps remain.
- Pour the yellow cake batter into the prepared baking dish and bake for 30 minutes. A toothpick inserted into the center should come out clean when done.
- Once the cake is removed from the oven, using the handle of a wooden spoon, poke holes all over the cake. Allow the cake to cool slightly on the counter while you make the instant banana pudding.
- In a large mixing bowl, add the packet of instant banana-flavored pudding and milk. Whisk for 2 minutes by hand until combined. You want this to still be pourable, so DO NOT let it stand for the entire 5 minutes that is stated on the box directions for the pudding before pouring it into the holes poked into the warm cake.
- Pour half the banana pudding mixture over the top of the warm cake, being sure to get it into all the holes. You can use the back of a large spoon to gently push the pudding into all the holes.
- Add the remaining half of the banana pudding and smooth the pudding into an even layer over the cake.
- Place the thinly sliced banana pieces into an even layer over the entire surface of the cake.
- Spread the thawed whipped topping evenly over the banana slices and garnish with the vanilla wafers. I like to place 1 vanilla wafer into the center of each serving of cake. This way each person gets a cookie on the top of their piece
- Refrigerate this banana pudding cake for 12 hours, or overnight, before slicing and serving.
TIPS:
- Oven temperatures vary and may need to be recalibrated periodically to ensure they are accurate. Make sure to keep a close eye on your cake as the suggested baking time approaches.
- It’s best to make the holes in the baked cake while it is still slightly warm because as it cools, the crust on top of the cake will crumble more easily.
- When you’re pouring the pudding mixture into the holes, tap the pan on the counter a few times to get rid of any air bubbles, and make sure the pudding fills the holes completely.
- If you plan on making this dish more than a day in advance, wait to place the vanilla wafer cookies onto the top of the cake. The cookies will get soft the longer they sit on the cake and in the refrigerator. Alternatively, you can crush your vanilla wafer cookies and sprinkle them onto the top and place some additional fresh banana slices onto the top of the cake for a slightly different garnish. I would also wait to do this until just before you plan to slice and serve this cake.
- The cake really needs to sit overnight in the refrigerator to absorb all of the liquid. If you rush this process, your cake will not absorb the liquid and could come out very wet at the bottom.
CHRISTMAS RED VELVET POKE CAKE
- 15.25 ounce box red velvet cake mix
- 1¼ cups water
- ½ cup vegetable oil
- 3 large eggs
- Cheesecake Flavored Instant Pudding Mix
- 3¾ cups cold whole milk
- 6.8 ounces cheesecake flavored instant pudding mix (3.4-ounce packets)
Whipped Topping and Decoration
- 10 to 12 drops green food coloring
- 16 ounces whipped topping thawed (8-ounce tubs)
- 3 cups mini marshmallows
- ¼ cup red M&M’s
- ¼ cup green M&M’s
- red sprinkles
Directions:
- Preheat the oven to 350°F. Spray a 9×13-inch pan with baker’s spray (Baker’s Joy or generic version). Set it aside.
- Using a medium-sized mixing bowl and a handheld mixer on medium speed, prepare the cake mix according to the box directions.
- Bake for 25 minutes.
- Using a rounded handle of a wooden spoon, poke holes into the cake about ½ inch apart. Set it aside to cool.
Cheesecake Flavored Instant Pudding Directions
- Using a medium-sized mixing bowl, whisk together the pudding mixes and the cold milk for 1 to 1½ minutes, just until the pudding starts to thicken.
- Evenly pour the pudding over the prepared cake. Use a spatula to smooth the pudding over the prepared cake.
- Tightly cover the cake and chill in the refrigerator for 4 hours.
Whipped Topping Layer Directions
- Using a spoon, stir in the green food color into the thawed whipped topping. Stir until the color is uniform.
- Remove the cake from the refrigerator. Evenly spread the tinted whipped topping over the pudding layer.
- Evenly sprinkle the mini marshmallows over the tinted whipped topping layer.
- Evenly sprinkle the red and green m and m’s and the red sprinkles.
- Cut twelve 3-inch x 3-inch squares.
BOSTON CREAM POKE CAKE
- 1 box butter yellow cake mix, plus ingredients called for on package (vegetable oil, eggs, water)
- 6.8 ounces (2 x 3.4-ounce boxes) instant vanilla pudding, (see directions for not using the entire second box of pudding)
- 4 cups whole milk
- 2 teaspoons vanilla extract
Ganache
- 2 tablespoons butter
- 1 cup semi-sweet chocolate chips
- 1 cup milk chocolate chips
- ⅔ cup heavy cream
- 1 teaspoon vanilla extract
Directions:
- Make the yellow butter cake mix according to package directions. Pour into a lightly greased 9×13 baking dish. Place in the oven and bake at the recommended temperature and time from the cake box directions.
- Remove the cake from the oven and let cool. Once cooled, use the back of a wooden spoon to poke holes all over the top of the cake, about an inch and a half apart. Set aside.
- In a medium mixing bowl, combine instant vanilla pudding, whole milk, and vanilla extract. Use a whisk to combine.
- Before pouring, take out ½ cup of the mixture and set aside then immediately pour the pudding mixture over the top of the cake before it has a chance to set up.
- Place the cake in the refrigerator for 1 hour.
- In a medium mixing bowl, combine butter, semi-sweet chocolate chips, milk chocolate chips, heavy cream, and vanilla extract. Stir together. Place in the microwave for 30 seconds. Remove and stir together. Repeat heating in 30-second increments until the chocolate is melted and the mixture is combined.
- Pour the chocolate over the top of the cake and place it in the refrigerator for at least 4 hours or overnight if you have the time.
CANNOLII POKE CAKE
For the Cake Base
- 15.25 ounces white cake mix, we used Pillsbury brand (432g)
- 1 ¼ cup water
- ½ cup vegetable oil
- 4 egg whites
- 14 ounces sweetened condensed milk, divided ¾ cup for drizzling and ½ cup for frosting (we used Great Value brand) (396g)
For the Frosting
- 1 ½ cups Ricotta cheese, we used Great Value brand
- 1 ½ cups Mascarpone cheese, we used BelGioioso brand
- 1 teaspoon pure vanilla extract
- ¼ teaspoon pure almond extract
- 3 cups powdered sugar, sifted
- ¼ teaspoon ground cinnamon, optional
- 1 cup mini semi sweet chocolate chips, we used Nestle Toll House brand
- 1 tablespoon powdered sugar, optional for dusting
Directions:
- Preheat the oven to 350*. Spray a 9×13 baking dish with nonstick baking spray.
- Add the dry cake mix, water, vegetable oil, and egg whites to a medium size (2-3 quarts) mixing bowl. Mix with a handheld mixer on medium speed until well combined.
- Pour the cake batter into the prepared baking dish. Bake for 23-25 minutes, or until a toothpick inserted comes away clean. (Keep in mind that all ovens cook differently, so begin checking the cake at 18-20 minutes)
- Use either the back of a wooden spoon to poke holes about 1 inch apart.
- Immediately drizzle ¾ cup of the sweetened condensed milk into the holes of the cake and over the entire surface. Carefully use a spoon or offset spatula to smooth the sweetened condensed milk over the cake. Chill, uncovered, in the refrigerator for 30 minutes, or until completely cooled.
- Using either a stand mixer fitted with a whisk attachment or a handheld mixer on medium-high speed, mix together the ricotta cheese, mascarpone cheese, ½ cup of the sweetened condensed milk, vanilla, almond extract, and optional ground cinnamon. Mix just until well combined. It is very important not to overmix, as the mascarpone cheese can become watery. Beat just until the mixture is smooth.
- Lower the mixer speed to low, and add the powdered sugar, 1 cup at a time, mixing just until incorporated.
- Remove the cooled cake from the refrigerator. Use either a silicone spatula or an offset spatula to evenly spread the frosting over the top of the cake.
- Sprinkle the mini chocolate chips over the top of the cake. Cover and chill in the refrigerator for 2 hours.
- Just before serving, dust with 1 tablespoon of powdered sugar, if you choose. Use a kitchen knife to carefully cut 3 x 5 slices for a total of 15. Serve and enjoy!
COCONUT POKE CAKE
- 1 box yellow cake mix with pudding
- 2 cups coconut, shredded
- 15 ounces cream of coconut
- 16 ounces Cool Whip
Directions:
- Make cake batter according to the directions on the cake mix package.
- Add 1 cup of shredded coconut to the cake mix, then stir together.
- Bake the cake mix according to box directions.
- Remove from the oven and while it’s still warm, use a large meat fork or wooden spoon to poke holes evenly throughout the cake.
- Pour the cream of coconut across the cake, so it seeps down into the holes. Allow cake to cool.
- Mix the remaining cup of shredded coconut with the 16 ounces of Cool Whip and use to frost the cake.
TIPS:
- Make sure you buy cream of coconut and not coconut milk. Cream of coconut is thicker and richer than coconut milk and is the sweetened version of coconut cream! You can usually find the cream of coconut in the alcohol aisle of the grocery store near the margarita mixes.
- It’s best to make the holes in the cake while it is still slightly warm because as it cools, the crust on top of the cake will crumble more easily.
- When you’re pouring the cream into the holes, tap the pan on the counter a few times to get rid of any air bubbles and make sure the cream fills the holes completely.
TURTLE POKE CAKE
- 15.25 ounces yellow cake mix
- 3 large eggs
- 1 cup water, room temperature
- ½ cup canola oil
- 14 ounces caramel sauce, ice cream topping
- 14 ounces sweetened condensed milk
- 16 ounces chocolate fudge frosting
- 8 ounces Cool Whip whipped topping, thawed
- ¼ cup pecans, chopped
- good quality chocolate sauce and caramel sauce in a squeeze container, for garnish (I used Ghirardelli premium sauces)
Directions:
- Preheat oven to 350°F. Spray a 9×13 glass baking dish with baker’s spray.
- In a large mixing bowl, using a handheld mixer on medium speed, mix the yellow cake mix, eggs, water and canola oil for 2 minutes. This is based on the directions on the back of the box.
- Pour the yellow cake batter into the prepared baking dish and bake for 35 minutes.
- While the cake is baking you will combine, in a small bowl with a pour spout, the 14-ounce jar of caramel sauce and sweetened condensed milk. Stir until completely combined.
- When the cake comes out of the oven you will use the handle of a wooden spoon to poke holes all over the hot cake. Slowly pour the caramel and sweetened condensed milk mixture evenly over the top of the warm cake. Make sure to get the caramel sauce into all the holes. Allow the cake to cool on the counter for at least 1 hour to allow the caramel sauce to be absorbed into the cake.
- While your cake is cooling on the counter you will make your frosting by adding the chocolate fudge frosting to a large bowl and whipping it on medium speed for 1 minute or until light and fluffy.
- Fold the thawed Cool Whip whipped topping into the fluffy chocolate fudge frosting. Make sure there are no streaks of whipped topping in your frosting. You can store your chocolate fudge whipped topping in the refrigerator until your cake has cooled completely on the counter.
- Once cooled, spread the chocolate fudge whipping frosting evenly over the top of the caramel cake.
- Garnish the top of the turtle poke cake with a drizzle pattern of the caramel sauce, chocolate sauce and sprinkle evenly with the chopped pecans. Refrigerate for a minimum of 4 hours but up to overnight.
TIPS:
- The eggs, water, and canola oil in the ingredients may vary depending on the brand of cake mix you are using.
- You will note that there are 2 different forms of caramel in this chocolate turtle poke cake recipe. For the 14-ounce jar, any brand you would use for an ice cream sauce will work great. You want it to be pourable for this recipe. I highly recommend using a thicker caramel sauce to drizzle onto the top for garnish, along with a good quality chocolate sauce. The ones in the squeeze containers work great for this recipe and can be stored in your refrigerator to use for other applications. They make great coffee or hot cocoa toppers.
- It’s best to make the holes in the cake while it is still slightly warm because as it cools, the crust on top of the cake will crumble more easily.
- When you’re pouring the cream into the holes of the cake, tap the pan on the counter a few times to get rid of any air bubbles, and make sure the caramel fills the holes completely.
- We used the Cool Whip whipped topping to lighten up the chocolate fudge frosting for this recipe, but if you prefer a richer chocolate frosting, you can omit the whipped topping and use two containers of the chocolate fudge frosting to frost the cake. Alternatively, you can use the milk chocolate version if that is your preference.
- This turtle cake recipe is best when it has had plenty of time to allow the cake to absorb the wonderful caramel sauce to make it a very moist cake.
COZY SOUPS

CHICKEN AND RICE
- 1½ cups yellow onion diced
- 1½ cups celery sliced
- 2 tablespoons olive oil
- 1 teaspoon sea salt
- 1½ cups carrot sliced
- 2 pounds bone-in, skin-on chicken (drumsticks and/or thighs will have the most flavor, but white meat can also be used)
- ½ teaspoon black pepper
- 3-4 sprigs fresh thyme
- 1 sprig fresh rosemary
- small bunch parsley (reserve some for garnish)
- 6 cups chicken broth (or half chicken broth/half water)
- 1 cup white rice (we used basmati)
Directions:
- In a large stockpot or Dutch oven, saute onion and celery in the olive oil over medium heat. Sprinkle 1 teaspoon of salt over the vegetables and stir while cooking. Cook until onions are soft and translucent and some caramelization begins to show on the vegetables.
- Add carrots, chicken pieces, pepper, and herbs.
- Cover the contents in the poot with chicken broth/water. Bring to a boil over high heat. Then, reduce to a simmer and cover with a lid.
- Simmer the chicken for at least 30 minutes, which will give the flavors enough time to blend and add richness and depth to the soup broth.
- Remove chicken (bones and skin included) from the pot and set aside.
- Add the rice to the soup mixture and continue simmering, lid on, for about 10 minutes longer, until the rice has softened and is cooked through.
- Meanwhile, separate the chicken meat from the bones and skin. Discard bones and skin. Shred or chop the chicken and return it to the pot to continue simmering for the remainder of the time it takes for the rice to cook.
- Stir the soup, season with salt and pepper to taste, and serve.
TIPS:
- If you use part water or add more water, you will likely need to season the soup with more salt. If you use chicken broth, you will likely need little to no extra salt.
- Don’t lift the lid while the rice cooks.
- The longer you simmer the vegetables and meat, the more flavorful the broth will be. Try to strike a balance between a rich soup base while not cooking the vegetables so long they become pure mush. Simmer for at least 30 minutes and up to 2 hours.
- If you simmer the soup for a longer period of time, some of the liquid will evaporate even with a lid covering the pot. Add a bit more chicken broth (or water) if you need more liquid. You can also reduce the amount of rice added at the end.
- Add a sprinkle of parmesan cheese on top for some cheesiness.
CHICKEN POT PIE SOUP
- 4 tablespoons unsalted butter
- 1 medium onion, chopped
- 2 celery stalks, chopped
- 1½ pounds baby Dutch yellow potatoes, cubed into ¼-inch pieces
- 2 garlic cloves, minced
- ⅔ cup all-purpose flour
- 2 teaspoons salt
- 2 teaspoon poultry seasoning
- 1 teaspoon black pepper
- 1 teaspoon oregano
- 1 teaspoon thyme
- 1 bay leaf
- 4 cups chicken broth
- 2 cups vegetable broth
- 1 (10-ounce) bag frozen mixed vegetables (carrots, peas, green beans, and corn)
- Rotisserie chicken, shredded or cut into cubes
- 1 cup heavy cream
- Puff pastry dough
Directions:
- Melt butter in a large saucepan or Dutch oven over medium heat. Add in chopped onions, celery stalk, potatoes, and minced garlic. Sauté vegetables and stir occasionally until tender, about 5 to 7 minutes.
- Add in flour, salt, poultry seasoning, black pepper, oregano, thyme, and bay leaf. Gently stir, coating the sauteed vegetables.
- Slowly add in chicken and vegetable broth. Let the broth simmer for 15 minutes over medium heat.
- Remove bay leaf, stir in the bag of frozen vegetables, shredded rotisserie chicken, and heavy cream.
- Turn heat to low and let the soup continue cooking for 15 minutes.
- While the soup is simmering, cut out pastry puff into the bowl size and bake per directions on the box.
- Serve soup with puff pastry.
TOMATO SOUP
- 3 tablespoons extra virgin olive oil
- 3 tablespoons salted sweet cream butter
- 1½ cups sweet yellow onion finely diced
- 1 tablespoon fresh garlic minced
- 3 tablespoons all-purpose flour
- 58 ounces tomato puree
- 32 ounces vegetable broth
- 1 tablespoon tomato paste
- 1 tablespoon granulated sugar
- 1½ teaspoons kosher salt
- 1 teaspoon dried basil
- ½ teaspoons fresh cracked black pepper
- ⅛ teaspoon red pepper flakes
- 2 whole bay leaves
- 2 tablespoons basil thinly sliced (optional garnish)
Directions:
- Using a five to six quart stockpot, over medium-high heat, add the olive oil and butter.
- Add the finely diced onion and fresh minced garlic. Cook for five to seven minutes, stirring often until the onion is translucent.
- Whisk in the flour and continue to cook and stir for two minutes.
- Add the tomato puree, vegetable broth, and tomato paste. Stir to completely incorporate the tomato paste.
- Add the granulated sugar, kosher salt, dried basil, cracked pepper, red pepper flakes, and whole bay leaves. Stir occasionally until the soup begins to simmer. Lower the heat to medium and continue to cook for 15 to 20 minutes, stirring occasionally.
- Remove the soup from the heat. Remove the bay leaves before serving.
- Garnish with fresh, thinly sliced basil.
TIPS:
- Adding a little sugar helps to neutralize the acidity of the tomatoes.
- If you prefer a chunky soup, you can serve it as is or, if you want a creamy texture, you can run the soup through an immersion blender or regular blender before serving. If using a regular blender, be very careful to blend in small batches.
- For an extra creamy tomato soup, add a little cream or milk.
POTATO CHEESEBURGER
- 1 pound ground beef
- 4 tablespoons unsalted butter, divided into 1 tablespoon and 3 tablespoons
- 1 medium white onion, diced
- ¾ cup carrots, shredded
- ¾ cup celery, diced
- 1 tablespoon Italian seasoning
- ½ teaspoon oregano
- 1 teaspoon salt
- ½ teaspoon black pepper
- 3 large russet potatoes, peeled and cut into bite-size pieces (about 3 cups)
- 3 cups chicken broth, low sodium
- ¼ cup all-purpose flour
- 4 cups sharp cheddar cheese, shredded
- 1½ cups milk, 2{bdd145d319586a8a7f06d077125d3bd341bea2e2af34aa66dee38ed6885d60ff}
- ¼ cup sour cream, full fat
Directions:
- In a 12-inch frying pan, thoroughly cook the ground beef. Drain the fat and set aside for now.
- In a large 5-quart pot with 1 tablespoon of butter over medium-high heat, sauté the onion, carrots, and diced celery with the Italian seasoning, oregano, salt, and pepper until onions have softened, 2 to 3 minutes.
- Add the beef, potatoes, and chicken broth to the pot. Reduce the heat to low, cover with a lid, and simmer for 10 to 12 minutes, until potatoes are tender.
- In a separate small frying pan, melt the remaining 3 tablespoons of butter over medium-high heat and stir in the flour until it starts to bubble, 2 minutes. Then add this mixture to the soup, stirring well to mix.
- Stir in the cheese until fully melted.
- Add the milk and bring the soup back to a simmer. Then stir in sour cream until well mixed.
- Remove from heat and serve hot.
TIPS:
- You’ll definitely want to drain the excess grease off the ground beef after cooking. You can make this step easier by using lean ground beef.
- You could also freeze individual portions in freezer-safe containers to make it easy to reheat and serve for a quick lunch.
BUSY DAY SOUP
- 1 tablespoon olive oil
- 1 pound lean ground beef 93{bdd145d319586a8a7f06d077125d3bd341bea2e2af34aa66dee38ed6885d60ff} to 7{bdd145d319586a8a7f06d077125d3bd341bea2e2af34aa66dee38ed6885d60ff} (also known as ground sirloin)
- 1 packet onion mushroom soup mix, I used Lipton brand from a 1.8-ounce box
- 2 cups water, room temperature
- 4 cups 1 quart low-sodium vegetable broth
- 15.25 ounces whole kernel corn, drained
- 14.5 ounces cut green beans, drained
- 14.5 ounces peas and carrots, drained
- 14.5 ounces petite diced tomatoes, in juice
- ½ teaspoon salt
- ½ teaspoon black pepper
- ½ pound dry elbow pasta noodles (8 ounces)
Directions:
- In a large (6 to 8 quart) stockpot, on medium-high heat, add the olive oil and lean ground beef. Brown the beef for 5 to 6 minutes or until no pink remains. Break up the meat as it is browning. Drain any excess fat from the pot before adding the remaining ingredients.
- Add the onion mushroom soup mix packet to the 2 cups of water and stir to combine and hydrate the onions and spices. Add to the pot of cooked and drained ground beef.
- Add the low-sodium vegetable broth, whole kernel corn, cut green beans, peas & carrots, petite diced tomatoes, salt, and black pepper.
- Lower the heat to medium and simmer the busy day soup for 20 minutes stirring every few minutes.
- Add the dry pasta to the pot of simmering soup, stir and cook the noodles for 10 to 13 minutes. Make sure to stir the soup every few minutes to make sure that the noodles are not sticking to each other. Turn off the heat to the pot once the noodles are cooked fully.
TIPS:
- Add low-sodium or no salt added broths and canned vegetables to control the amount of salt. If you do not use the low-sodium/no salt versions, you will want to reduce the amount of additional salt added to your recipe. You can increase, or decrease, the amount of salt in the recipe according to taste.
- Ground beef can be cooked ahead of time and stored in the fridge or freezer until you are ready to use it. This is a great time saver for busy days.
- You will want to serve this busy day soup right away as the pasta noodles will continue to cook and absorb the liquid from the soup as it sits.
BROCCOLI CHEESE SOUP
- 8 tbsp butter
- 1 cup finely chopped sweet onion
- 1 tbsp minced garlic
- ⅓ cup all-purpose flour
- 2½ cups chicken broth
- 2 cups whole milk
- 1 cup heavy cream
- 3½ cups broccoli florets
- 3½ cups shredded extra sharp cheddar
- ½ cup shredded parmesan
- 1½ tsp kosher salt
- 1 tsp cracked black pepper
Directions:
- Using a 4-5 quart heavy-bottomed stockpot over medium-high heat, melt the butter.
- Add the onion and cook uncovered for 4-5 minutes, or until the onion is softened and translucent, stirring constantly.
- Lower the heat to medium-low and add the garlic. Cook for 1 minute, stirring constantly.
- Add the flour, and cook for 1 minute, stirring constantly.
- Whisk in the chicken broth, milk, and heavy cream. Continue to whisk to combine and break any lumps.
- Lower the heat to low and allow the soup to begin to thicken and slightly bubble.
- Add the broccoli. Continue to stir occasionally to keep the soup from scorching. Cook for 10-12 minutes, or until the broccoli softens.
- Remove the soup from the heat. Stir in the grated sharp cheddar cheese and parmesan. Stir until the cheese is completely incorporated.
CROCKPOT POTATO SOUP
- 1 lb bacon
- 1 white onion, diced
- 2 lbs Yukon gold potatoes, diced
- 6 cups chicken broth
- ½ tsp black pepper
- 8 oz cream cheese
- ½ cup sour cream
- 3 cups shredded cheddar cheese
- 2 tbsp all-purpose flour
- 1 cup heavy cream
- ½ cup chives
Directions:
- Chop bacon into small pieces (about ½ inch). In a large skillet over medium heat, saute the bacon until crisp. Remove bacon from the grease with a slotted spoon and set aside.
- Add the diced onion to the bacon grease in the skillet and saute over medium heat until translucent. Transfer the onion to the bottom of the crockpot, reserving about 2 tablespoons of bacon grease in the skillet.
- Add the potatoes and chicken stock to the crockpot.
- Cook on HIGH for 3 hours.
- Add the cream cheese, sour cream, and 2 cups cheddar cheese to the crockpot and continue cooking an additional 30 minutes until the cheeses have melted.
- Use a potato masher or immersion blender to break down some of the potato chunks until the desired consistency is reached.
- To further thicken the soup, add the 2 tablespoons of flour to the reserved 2 tablespoons of bacon grease in the skillet. Cook over medium heat until the flour is bubbly. Whisk in heavy cream until a smooth, but thick paste forms.
- Stir the flour/cream mixture into the soup. Cook for 15 more minutes.
- Stir in half of the bacon pieces. Season with salt and pepper if desired.
- Serve soup with reserved cheese, bacon, and chives.
TIPS:
- For a thicker soup, use just 4 cups of chicken broth, keeping all other ingredients the same. This will make a smaller quantity of soup overall, and it may be thick enough that the flour/cream roux is not needed.
- Cooking the onions and, later, the roux (flour and cream mixture) in the bacon grease adds a ton of flavor and depth to the soup. If you are not using bacon or do not wish to add the extra fat from the grease, you can use olive oil or just a tablespoon of butter to cook the onions. You can also make a roux to thicken the soup using 2 tablespoons of butter, 2 tablespoons of flour, and cream.
- Some recipes add the cooked bacon to the pot to cook along with all of the other ingredients. We prefer to add the bacon flavor by cooking the onion in the bacon grease. When bacon cooks for a long time (such as in the crockpot), it can get rubbery and take on an undesirable texture. Stirring in the bacon just before serving maintains its nice, crunchy texture and full flavor.
EASY CROCKPOT MEALS
CROCKPOT CHICKEN ALFREDO PASTA:
- 2 lb chicken breasts
- 16 oz box penne pasta
- 1 cup low-sodium chicken broth
- 0.7 oz packet dry Italian dressing mix
- 1 tsp kosher salt
- ½ tsp black pepper divided
- 2 cups half & half
- 1½ cups heavy cream
- 1½ cups grated parmesan cheese
- ½ cup all-purpose flour
- 10 tbsp unsalted butter
- 2 tbsp grated fresh garlic
- 1 tbsp dried parsley
- 1 tbsp fresh parsley
Directions:
Cook time: 4 hours LOW Yields: 8 servings
- In the insert of your slow cooker/crockpot, place your boneless skinless chicken breasts. Sprinkle ½ teaspoon kosher salt and ¼ black pepper evenly over the chicken. Sprinkle the entire contents of the dry italian dressing mix evenly over the chicken as well.
- Pour the chicken broth into the crockpot with the chicken and spices. Cover with the lid and turn on HIGH for 4 hours.
- Once your chicken is done, remove it and shred it using 2 forks to pull it apart into bite-sized pieces.
- Pour out all but 1 cup of the excess liquid that is remaining in the pot. Return the shredded chicken back to the crockpot insert and add back the reserved 1 cup of the seasoned cooking liquid.
- Turn your crockpot to WARM while you cook your pasta and make your sauce.
- Cook your pasta according to package directions (8-10 minutes) and drain when done.
- In a medium saucepan, on medium heat, melt your butter. Once your butter is melted, whisk in the flour making sure there are no lumps.
- Add your grated garlic, dried parsley, remaining ½ teaspoon salt, and ¼ teaspoon black pepper. Whisk to combine. Slowly add the half & half and heavy cream, making sure that you are whisking the entire time. This is very important to avoid any lumps in your final alfredo sauce.
- Cook your cream mixture for 5-6 minutes, whisking often, until it starts to bubble and thicken. Once your cream mixture has thickened, turn off the heat and add your grated parmesan cheese. Stir to completely combine.
- Add your cooked and drained pasta to your shredded chicken, then pour your alfredo sauce on top. Stir to combine. You can top your slow cooker Olive Garden chicken alfredo pasta with the fresh chopped parsley at this time if desired.
STORAGE TIPS:
- To Store: You can store any leftovers in a covered container in the refrigerator for up to 3 days.
- To Freeze: I do not recommend freezing this dish since pasta and dairy does not thaw well.
- To Reheat: Reheat any leftovers in the microwave or stovetop. You can add a splash of water if it’s too thick.
TIPS:
- I love using crock pot liners because they make clean-up so easy!
If you want to make this a very easy meal, you can substitute the homemade sauce for a good quality jarred alfredo sauce. I would recommend at least 2 (24-36-ounce) jars for this amount of pasta and chicken. - If you prefer dark meat, you can use 2 pounds of skinless boneless chicken thighs in place of the boneless skinless chicken breasts. It will be equally as easy and delicious.
- You can use any short, sturdy pasta for this dish. I do not recommend elbow noodles or spaghetti noodles because they are not sturdy enough to hold up to this rich and creamy sauce.
- You can keep your crock pot on warm for 30 minutes before the pasta gets too soft and absorbs excess moisture.
- Alfredo sauce thickens while standing and thickens even more when added to the cooked pasta. If it seems too thin, resist the urge to thicken it as it will thicken once mixed with your pasta.
- To help make your sauce extra creamy, allow your cheese to come to room temperature before adding it to the sauce.
- The cheese will melt better when added to a bubbling cream mixture.
- It is very important to whisk the entire time to avoid any lumps in your final Alfredo sauce.
CROCKPOT LASAGNA:
- 1½ lb ground beef
- 2 tbsp Italian seasoning
- 24 oz roasted garlic herb spaghetti sauce
- 1 cup beef broth
- 2½ cups mozzarella cheese
- 2½ cups small curd cottage cheese
- 1 large egg
- 12 lasagna noodles
- Fresh minced parsley
Directions:
Cook time: 3½-4 hours LOW Yields: 10 servings
- In a large deep skillet over medium high heat, brown the ground beef until no longer pink.
- Drain any excess grease and then add the spaghetti sauce, beef broth, and 1 Tablespoon of Italian seasoning to the skillet and stir until everything is well mixed.
- Simmer uncovered for 10 minutes or until slightly thickened.
- In the meantime, combine 1 ½ cups of the divided mozzarella cheese, small curd cottage cheese, 1 Tablespoon Italian seasoning, and large egg together in a bowl. Stir everything together well.
- Spray the bottoms and sides of your crockpot and begin layering.
- Spread a layer of 1 cup of the meat sauce on the bottom of the crockpot.
- Layer 3 lasagna noodles on top of meat sauce. Fit the crock pot by breaking two lasagna noodles and leave one unbroken lasagna noodle for the middle layer. This will depend on the shape of your crockpot.
- Spread 1 cup of the cheese mixture on top of the noodles.
- Repeat the layering until everything is used. You should have enough for four sets of layers.
- Top the last layer of noodles with the remaining mozzarella cheese.
- Cover and cook on low for 3-5 hours or until the noodles absorb the liquid and are soft. You can check the noodles for tenderness by lifting them up and poking them with a fork or cutting them with a knife.
- Plate and serve warm with some minced parsley as a garnish, optional.
TIPS:
- I love using crock pot liners because they make clean-up so easy!
- If you want to make this a very easy meal, you can substitute the homemade sauce for a good quality jarred alfredo sauce. I would recommend at least 2 (24-36-ounce) jars for this amount of pasta and chicken.
- If you prefer dark meat, you can use 2 pounds of skinless boneless chicken thighs in place of the boneless skinless chicken breasts. It will be equally as easy and delicious.
- You can use any short, sturdy pasta for this dish. I do not recommend elbow noodles or spaghetti noodles because they are not sturdy enough to hold up to this rich and creamy sauce.
- You can keep your crock pot on warm for 30 minutes before the pasta gets too soft and absorbs excess moisture.
- Alfredo sauce thickens while standing and thickens even more when added to the cooked pasta. If it seems too thin, resist the urge to thicken it as it will thicken once mixed with your pasta.
- To help make your sauce extra creamy, allow your cheese to come to room temperature before adding it to the sauce.
- The cheese will melt better when added to a bubbling cream mixture.
- It is very important to whisk the entire time to avoid any lumps in your final Alfredo sauce.
CROCKPOT SPAGHETTI:
- 1 tbsp olive oil
- 1 lb lean ground beef
- ½ cup diced yellow onion
- 1 tbsp minced garlic
- 2 tsp Italian seasoning blend
- ½ tsp salt
- ¼ tsp black pepper
- 1 lb standard spaghetti noodles
- 48 oz marinara sauce
- 15 oz can of crushed tomatoes
- 2 cups chicken broth
- ½ cup parmesan cheese
- 1½ cups mozzarella cheese
- 1 tbsp fresh parsley
Directions:
Cook time: 3½-4 hours LOW Yields: 8 servings
- In a skillet over medium-high heat, add the olive oil, lean ground beef, diced yellow onions, minced garlic, Italian seasoning, salt, and black pepper. Cook, and brown the beef for 5-6 minutes or until no pink remains. If you have a lot of excess fat from the ground beef mixture, be sure to drain it off before adding it to the crock pot.1 tablespoon olive oil,1 pound lean ground beef,½ cup diced yellow onion,1 tablespoon minced garlic,2 teaspoons Italian seasoning blend,½ teaspoon salt,¼ teaspoon black pepper
- Add the cooked ground beef, spaghetti noodles, tomato & basil marinara sauce, crushed tomatoes, and 1 cup of chicken broth to the bowl of the crock pot.1 pound standard spaghetti noodles,48 ounces (2 24-ounce) jars of tomato & basil marinara sauce,15 ounces can of crushed tomatoes,2 cups chicken broth
- Place the lid onto the crock pot and cook the spaghetti on HIGH for 2 hours or just until the noodles are tender. Be careful not to overcook your noodles, or they will become mushy.
- Remove the lid to the crock pot, add the remaining 1 cup of chicken broth, and give the sauce and noodles a good stir with a pasta spoon or tongs to combine all the ingredients.2 cups chicken broth
- Top the spaghetti with the grated parmesan cheese and the shredded mozzarella cheese. Replace the lid and cook for another 20-30 minutes or until the cheese is melted.½ cup grated parmesan cheese,1½ cups shredded mozzarella cheese
- Remove the lid and sprinkle the chopped fresh parsley over the melted cheese.1 tablespoon chopped fresh parsley
CROCKPOT MAC AND CHEESE:
- 16 oz box elbow macaroni noodles
- 4 cups whole milk
- 8 oz extra-sharp yellow cheddar cheese
- 8 oz extra-sharp white cheddar cheese
- 8 oz Velveeta
- 1½ tsp sea salt
- ½ tsp white pepper
- 1 tsp ground mustard
Directions:
- In the insert of your crockpot, place the milk, uncooked elbow macaroni noodles, shredded cheeses and seasonings. Stir well.
- Turn the slow cooker on high and cook for 1 hour, stirring occasionally.
- Cut the Velveeta into small, one-inch cubes and stir in until it starts to melt.
- Cook on high for an additional 30-60 minutes until it’s hot and creamy, stirring occasionally.
- Important Note: After adding the Velveta, set a timer for 30 minutes check to see so if the sauce has thickened. (mine was still runny at 30 minutes). Check again at 45 minutes to see if has thickened. Once the sauce thickens, it is done. If you overcook it, the pasta will be mushy.Mine took 45 minutes.
TIPS:
- As with all appliances, not all crock pots cook the same. It is possible that your dish is done cooking a little early or needs a little more time! Not to worry, if it finishes early, just put it on low to keep it warm (we don’t want to overcook and get mushy). Also, if it is not quite finished, let it cook a little longer.
- Hate the mess of cleaning up your crock pot, try slow cooker plastic liner inserts, they make cleaning up a snap!
- If the sauce seems too thick, you can add a little bit of milk until you get your desired consistency.
Quick FAQ
What makes these our favorite recipes?
They’re unfussy, budget-friendly, and tested at real family gatherings. If it’s listed here, it earned a spot by being delicious, repeatable, and reliable.
Can I prep these favorite recipes ahead?
Yes—many are make-ahead friendly. Casseroles, dessert salads, dump cakes, and poke cakes often taste even better the next day. See the storage/safety links above for best practices.
How do I scale these favorite recipes for a crowd?
Casseroles and soups double easily. For desserts, keep the pan size consistent and make two pans instead of one oversized bake to ensure even cooking.
Helpful Resources:
USDA Food Safety—Minimum Safe Temperatures (chicken, beef, leftovers):
Pan Size Conversions & Substitutions (Joy of Baking):
Ingredient Substitutions (Allrecipes Guide):
Cheddar & Melting Tips (Cabot Cheese FAQ):
FINAL THOUGHTS:
Thanks for stopping by! I’ll keep adding to this list of favorite recipes as I rediscover family classics and test new twists. If you make one, tell me which became your family’s new favorite – I love hearing what works in real kitchens. You can email me at: kayeterryrrr247@gmail.com
Author: Kaye